Outils d'utilisateurs
Sidebar
projets:ready_to_mail_bento_box_for_gifts
Ceci est une ancienne révision du document !
Table des matières
"Ready to mail" bento box for gifts
Fiche projet

Table des matières
Returning from a 3 weeks holiday in Vietnam, we would like to find a way to send several typical asian souvenirs to relatives and friends. Inspired by Asia overall we aimed at developing a postbox that can be mailed and upon opening reveals itself as a bento-style box, including different gift items. This way the presents would reveal themselves in a traditional way and create a long lasting impression.
Design
What to consider:
- all items should be separated from each other, like the different food types in a bento box;
- the construct has to be stable enough to resist pressure during shipping;
- all items should be visible immediately, upon opening the box;
- finding the best way to secure items, without disabling them from being taken out, considering that the overal design should not be interrupted;
- inclusion of origami boxes and containers to capture the art of Asian paperfolding and find ways to pack smaller, loose items.
Production
STEP 1: Finding the mail box and cutting the right carton size as the base
Firstly it is important to measure the size of the box to be shipped. Next find a carton base, that serves as the floor for the bento box. This enables us to find out how many items can be included and we can begin to shuffle the objects around to find the right order and layout for the box.
STEP 2: Testing the layout of the different items, and marking their securing spots
The layout of the objects should begin on the floor. Once it has been decided in what order the objects will be placed, it is time to go ahead and punch holes around the objects, so they can be secured accordingly. As a next step the floor of the carton can be decorated with japanese wallpaper to give a better impression.

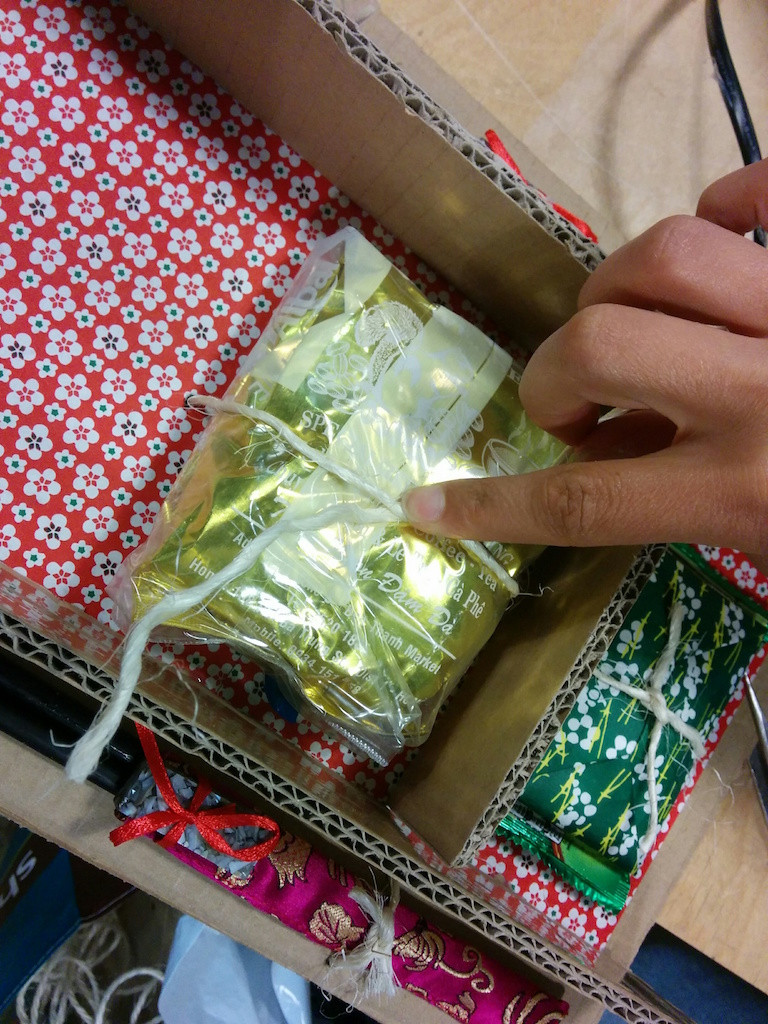
STEP 3: Holding the items
In order to secure the items, make sure that they can be taken out. the present has been opened, we decide to use cord and let it run through punches in the floor. The knots then can easily be opened, without damaging the box or the presents.
 Fig. 1: Chopsicks have been secured with knots
STEP 4: Creating the separation walls
As a next step we start building the walls, so the items can be placed within them. For this we use a hot-glue gun, as it enables us to “lay” the walls ontop of the glue lines and dries fast. It also serves a connection for the corners of the different carton pieces, that have been cut out.
Glueing the walls before attaching the items can prove challenging if you have big fingers but makes centering the items inside the compartments easier.

STEP 5: Placing the items within the compartments
The different items, such as coffee bags, tea flowers, chopsticks, Asian sweets and envelopes with teabags then get put into place and as above, holes are punched around them, to enable the cord to run through the carton base and secure them. All items then are being tied in the different compartments.
To see how to create origami boxes, scroll down to the decoration section.
TADA!
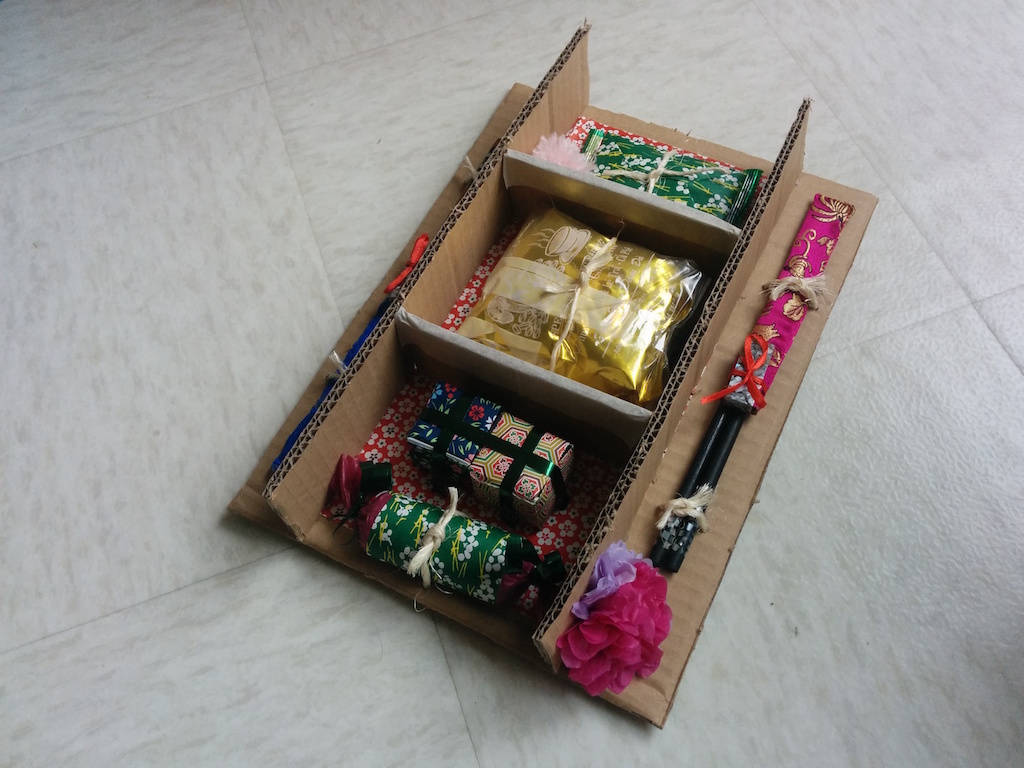
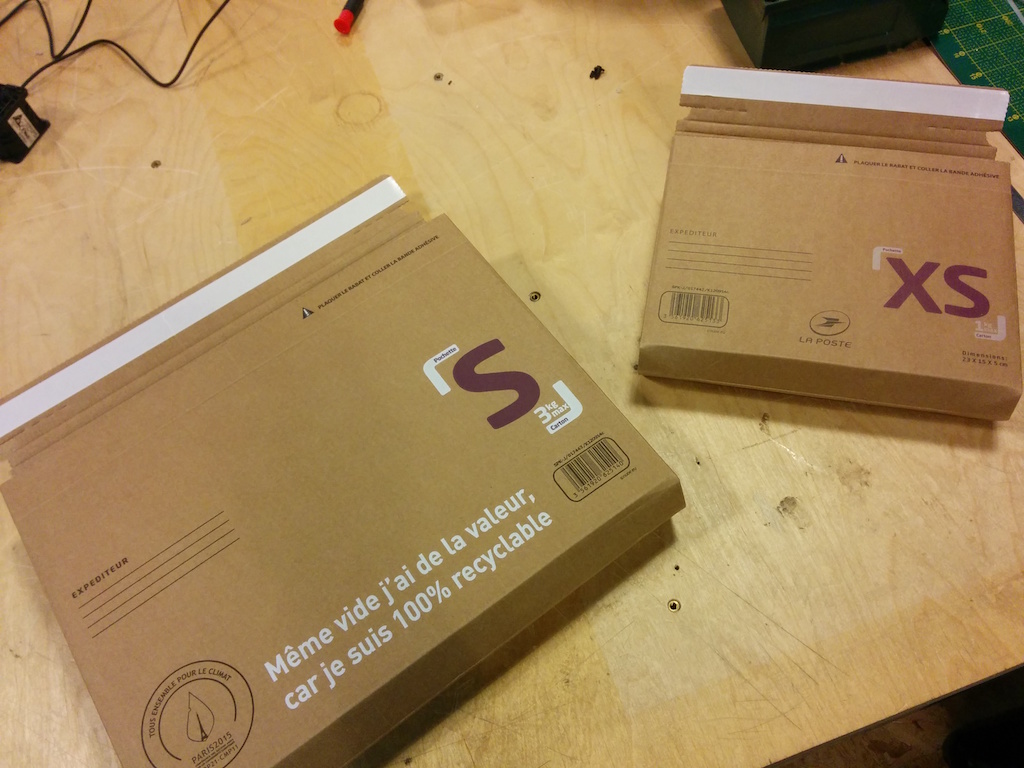
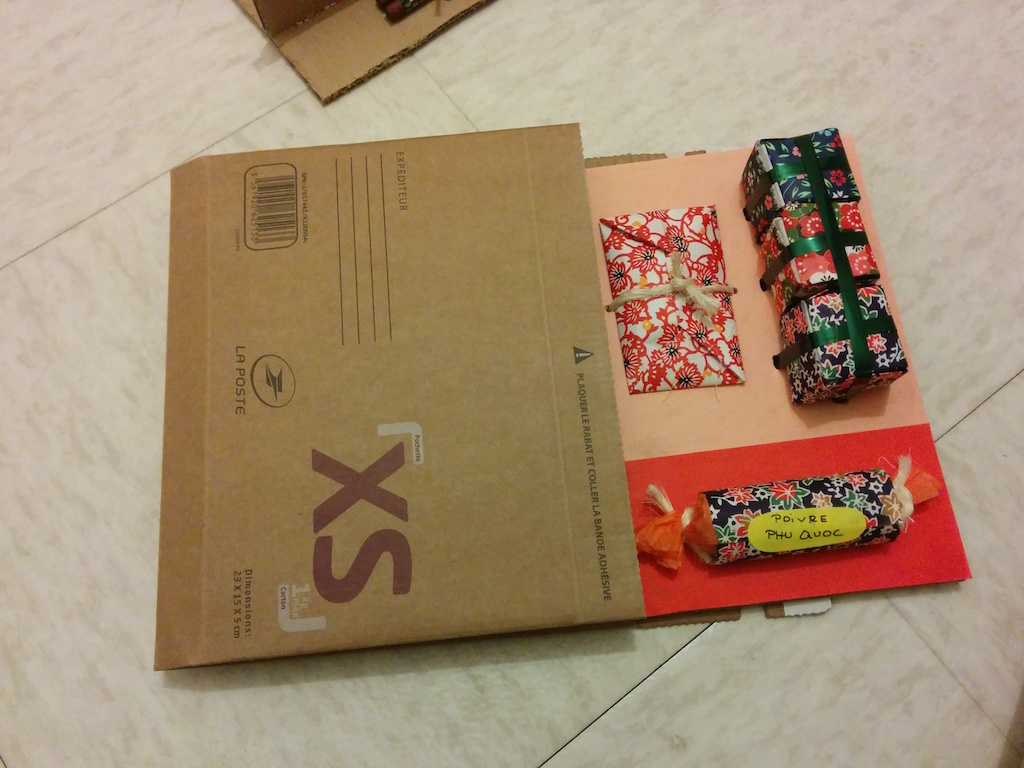
Variations of bento boxes
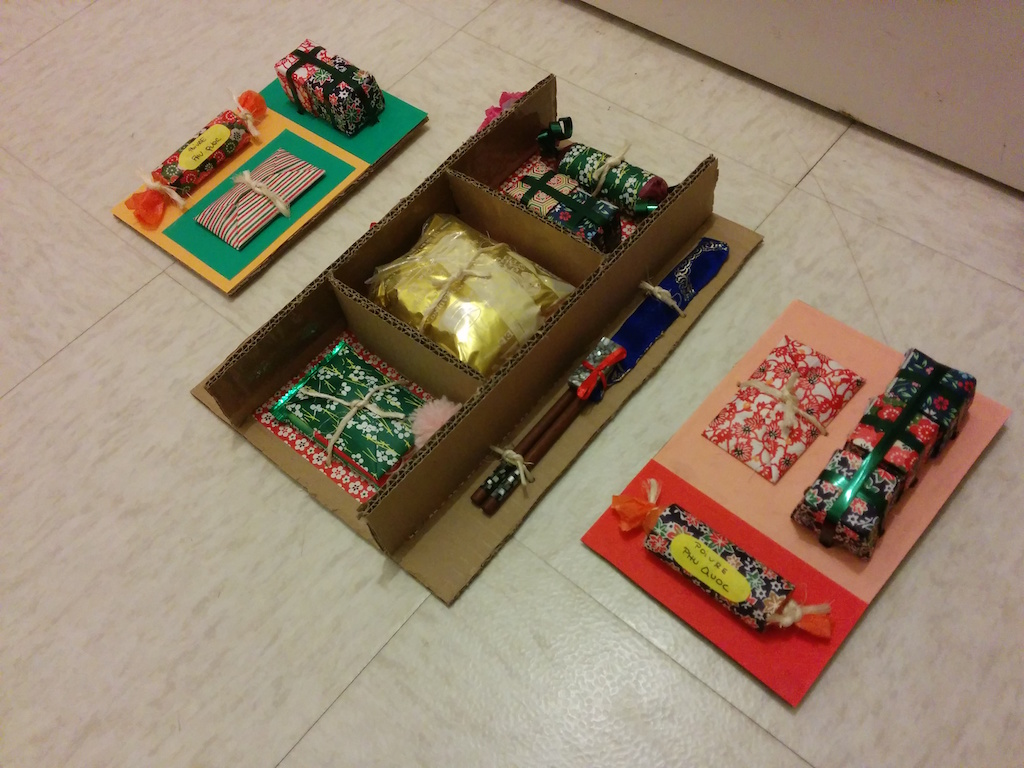
To contain different presents, we create different bento boxes and styles, to fit in either S or XS sized post boxes.
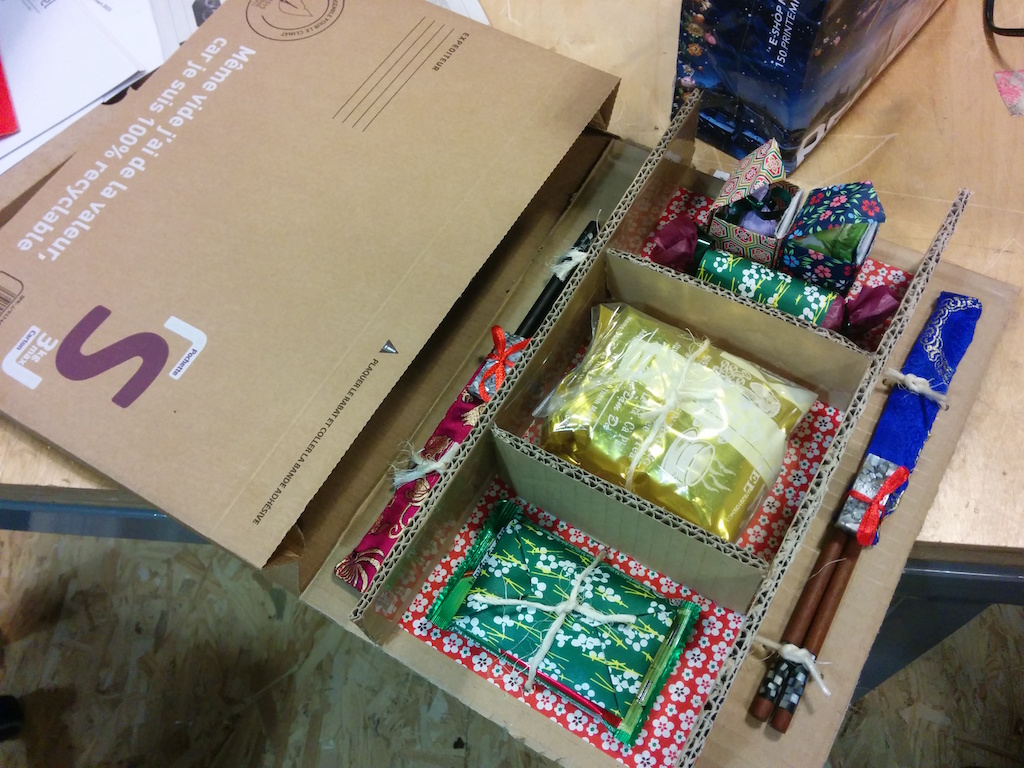
Ready for mailing
To check that the different gift items do not lay outside of the height restrictions of the parcel, a last fitting is necessary. The base then slowly will be slid into the post box and is ready for mailing.
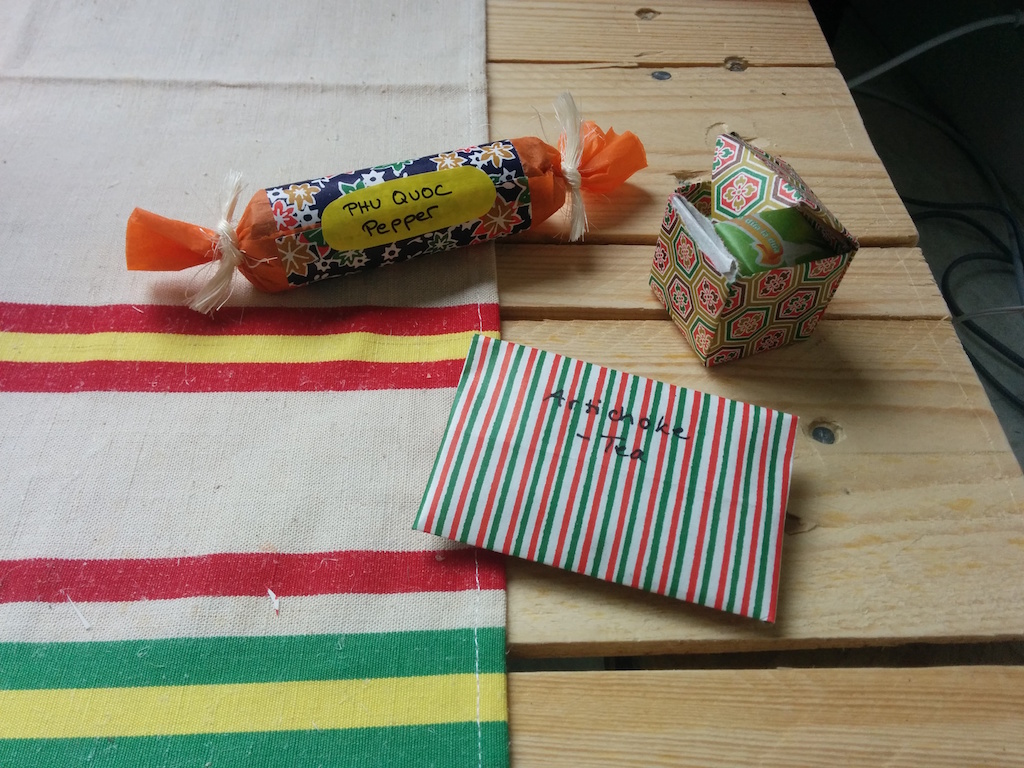
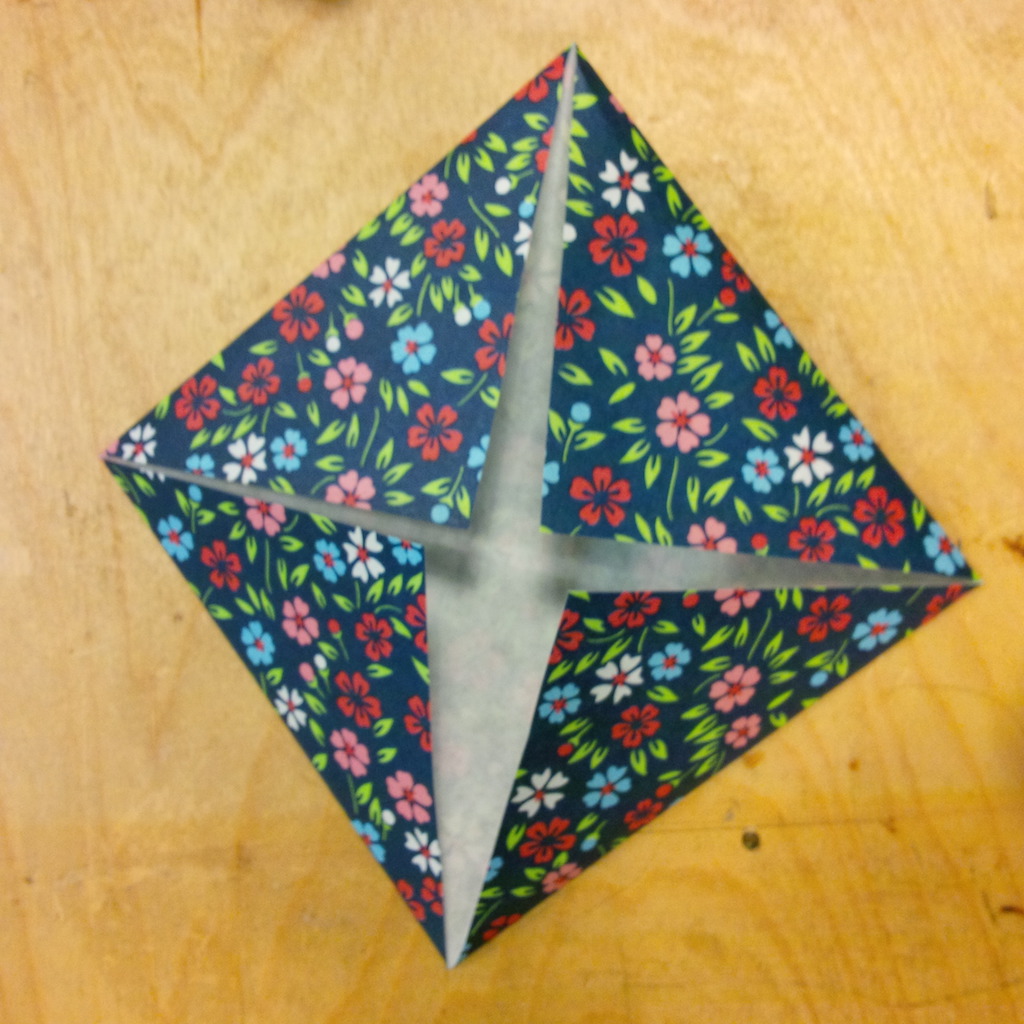
Decoration
Boxes
As mentioned, origami is used throughout the bento box, to stay in style with the Asian theme. For little tea flowers, little sealable boxes are created.


 Source: http://www.handmadecharlotte.com/diy-fruit-veggie-stamped-origami-boxes/
Enveloppes

Pompom

projets/ready_to_mail_bento_box_for_gifts.1458998274.txt.gz · Dernière modification: 2016/03/26 14:17 par copacabana
Universcience -
Carrefour numérique² -
@CarrNum -
Cité des sciences et de l'industrie -
30 avenue Corentin Cariou 75019 Paris
Sauf mention contraire, le contenu de ce wiki est placé sous la licence suivante : CC Attribution-Share Alike 3.0 Unported
